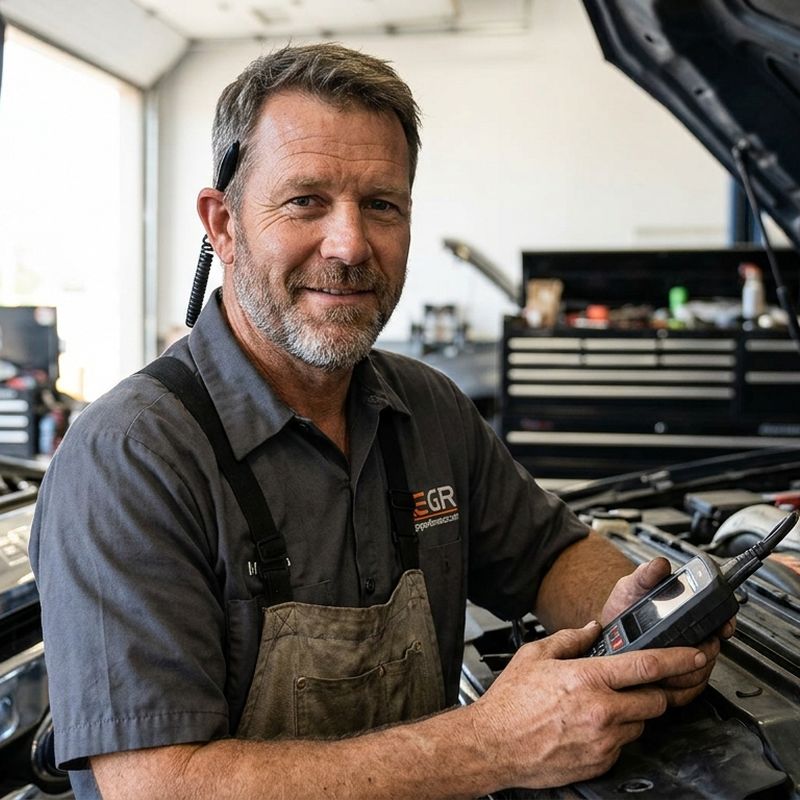
🔧 30-Second Summary: 6.4 Powerstroke EGR Delete Guide
On 2008–2010 Ford F-250 through F-550 trucks, factory EGR systems frequently fail due to excessive soot accumulation and extreme thermal stress. Installing heavy-duty EGR Performance EGR Delete Kit 6.4 Powerstroke equipped with precision block-off plates, a high-flow intake elbow, and coolant bypass hardware, paired with matching ECM tuning, permanently eliminates these failure points for off-road or competition use. To guarantee leak-free operation, always follow strict factory torque specs, thoroughly bleed the cooling system, and re-torque all hardware after the initial heat cycle.
Table of Contents
- What Is a 6.4L Powerstroke EGR Delete?
- Pre-Install Checklist & Compatibility
- Tools and Supplies Needed
- Safety & Preparation
- 6.4 Powerstroke EGR Delete Kit Instructions: Step-by-Step Installation
- Troubleshooting Common Issues During Ford 6.4 EGR Delete Instructions
- 6.4 Powerstroke EGR Delete Installation Tips
- How Long Does a 6.4 EGR Delete Installation Take?
- FAQs
- Conclusion
If you're searching for 6.4 Powerstroke EGR delete instructions, chances are you're already planning to install a delete kit and want a complete guide. A successful installation requires more than removing the factory EGR components. You also need the right tools, proper coolant rerouting, and compatible tuning to keep the engine running correctly.
Installing a 6.4 Powerstroke EGR delete kit removes the valve, vertical and horizontal coolers, and related piping, then seals the ports with block-off plates and reroutes coolant. The job needs a delete-capable tuner to prevent limp mode and DTCs such as P0401.
In this guide, we'll walk you through the entire process for installing an EGR delete kit on your 2008 through 2010 Ford 6.4L Powerstroke (you know, the ones in the F250s, F350s, F450s, and F550s). We'll cover everything from taking out the factory EGR setup to installing the new delete kit, and bleeding out your coolant system before you hit the road.
Disclaimer: An EGR delete kit for a 6.4 Powerstroke is usually only intended for use off-road or on race vehicles, assuming you are legally permitted to do so. Before you make any EGR deletes, look into your local emission laws before you make any decisions.
What Is a 6.4L Powerstroke EGR Delete?
A 6.4L Powerstroke EGR delete removes the EGR valve, vertical cooler, horizontal cooler, and associated pipes, then installs block-off plates and coolant bypass hoses so exhaust gas never recirculates and coolant no longer flows through the failed coolers.
Precision Fitment. Ultimate Durability.
Tired of wrestling with cheap parts that don't line up? Our 6.4L Powerstroke EGR Delete Kits from EGR Performance are CNC-machined for an exact OEM-plus fit, featuring heavy-duty block-off plates and high-temp hardware designed to permanently eliminate thermal fatigue and coolant leaks. Equip your competition rig with the reliability it deserves.
Shop 6.4 Powerstroke EGR delete kit →Before unbolting factory hardware, ensure you fully understand the operational changes and regulatory tradeoffs involved in bypassing emissions controls. For a complete breakdown of performance benefits, fuel economy changes, and emissions compliance factors, review our detailed guide on 6.4 Powerstroke EGR DPF delete pros and cons.
Your factory EGR system works by recirculating some of your exhaust gases back into the engine in order to reduce emissions. On a 6.4 Powerstroke, this system is made up of the EGR valve itself, EGR coolers, coolant lines, and all sorts of connecting pipes.
A 6.4 Powerstroke EGR delete simply removes all those EGR valve, cooler, and piping components from the engine. The delete kit seals up the exhaust ports with block-off plates, and you reroute the coolant so it no longer flows through the original EGR coolers.
Factory Layout and Common Failure Points
The 2008–2010 6.4L Powerstroke uses a dual-cooler EGR setup. A vertical cooler sits against the passenger-side head and a horizontal cooler mounts above the engine. Exhaust gas leaves the exhaust manifold, travels through the coolers, and re-enters the intake after the EGR valve meters the flow. Coolant from the engine block circulates through both coolers to drop gas temperature before it reaches the intake.
What the Kit Actually Does
A complete EGR delete kit eliminates every part of that circuit. Block-off plates seal the exhaust and intake ports on the head and intake manifold. An intake elbow or throttle-body pipe replaces the original EGR-fed intake path so fresh air flows without restriction. Coolant lines that once fed the coolers receive either hard plugs or short bypass hoses so coolant stays inside the engine and radiator circuit only. The result is zero recirculated exhaust gas, no soot accumulation in the intake, and no coolant path through a failure-prone cooler.
Most 6.4 Powerstroke EGR delete kits will come with block-off plates, either an intake elbow or a throttle pipe, some sort of coolant bypass hose or plugs, gaskets, O-rings, and all the necessary mounting hardware.
Typical Kit Contents
Component |
Purpose |
Material Preference |
|---|---|---|
Block-off plates |
Seal EGR ports on head and intake |
Billet aluminum or stainless |
Intake elbow |
Replace EGR-fed throttle path |
Cast aluminum with O-ring grooves |
Coolant plugs/hoses |
Reroute or cap cooler supply lines |
Silicone hose or threaded steel plugs |
Gaskets |
Prevent exhaust and coolant leaks |
Multi-layer steel or high-temp composite |
Most quality kits include:
- Machined aluminum or stainless block-off plates for the vertical cooler, horizontal cooler, and EGR valve mounting surfaces
- High-temperature gaskets or O-rings matched to each plate
- Intake elbow or throttle pipe with new clamps and seals
- Coolant bypass hoses or threaded plugs
- Hardware kit with grade-8 or stainless bolts
- Instruction sheet specific to the 6.4 platform
Before starting the installation, compare your parts in your 2008 - 2010 6.4 Powerstroke EGR Delete Kit to make sure you have all the required hardware, gaskets, and fittings.
Pre-Install Checklist & Compatibility
The 6.4 Powerstroke EGR delete kit fits 2008–2010 F-250, F-350, F-450, and F-550 trucks. Cab-and-chassis versions may need extra bracket work. We always scan for codes, check coolant condition, and verify compression before starting.
Before you begin, it's a good idea to make sure that your truck is compatible with the kit you have and that the engine's in good health.
Vehicle Compatibility
Using a high-quality Ford 6.4L Powerstroke EGR valve delete kit helps ensure proper fitment and includes the hardware needed for a simple installation. Most 6.4 Powerstroke EGR delete instructions are designed for the following trucks:
Vehicle |
Engine |
Compatible |
|---|---|---|
2008 Ford F250 |
6.4L Powerstroke |
✓ |
2008 Ford F350 |
6.4L Powerstroke |
✓ |
2009 Ford F250 |
6.4L Powerstroke |
✓ |
2009 Ford F350 |
6.4L Powerstroke |
✓ |
2010 Ford F450 |
6.4L Powerstroke |
✓ |
2010 Ford F550 |
6.4L Powerstroke |
✓ |
If you own a Cab and Chassis model, verify compatibility before purchasing a Ford 6.4 EGR delete kit because some plumbing and hardware may differ from pickup models.
Perform a Quick Health Check
Installing a delete kit will not fix existing engine problems. Before starting the job, inspect the truck for signs of underlying issues.
Check the following:
- Run for codes (any active diagnostic trouble codes that are showing)
- Check the coolant for contamination or any oil in it.
- Check for current leaks in the EGR cooler or the hoses.
Fixing existing problems first makes the installation smoother and helps you identify any new issues if they appear after the job is complete.
Skill Level and Installation Time
A 6.4 Powerstroke EGR delete is considered an intermediate to advanced DIY project because several engine components must be removed to access the EGR cooler assembly.
Time Expectation by Skill Level
Experience Level |
Estimated Time |
Key Time Drivers |
|---|---|---|
First-time DIY installer |
8 to 12 hours |
Surface cleanup, labeling, stubborn bolts |
Experienced technician |
4 to 6 hours |
Familiarity with cooler stack sequence |
Corroded truck |
+2–4 hours |
Penetrating oil, broken studs |
Tools and Supplies Needed
Basic hand tools, a torque wrench, coolant drain pan, jack stands, and labeled bags cover the entire 6.4 Powerstroke EGR delete. We also keep shop towels, gloves, and eye protection ready because coolant and soot will be present.
Having the right tools within reach makes the installation much easier. Before opening the hood, gather everything you need so you do not have to stop halfway through the job.
Basic Hand Tools
Most 6.4 EGR delete kit instructions require common hand tools found in a well equipped garage.
Tools List
Tool |
Purpose |
|---|---|
Metric socket set |
Remove factory bolts and brackets |
Ratchet and extensions |
Reach tight engine bay areas |
Torque wrench |
Tighten fasteners to specification |
Combination wrenches |
Remove hard to reach fittings |
Pliers |
Remove hose clamps and retaining clips |
Screwdrivers |
Remove intake clamps and electrical clips |
Pick tool |
Separate stubborn coolant hoses safely |
Additional Supplies
Keep these items nearby before starting the installation.
- Coolant drain pan
- Fresh manufacturer-approved coolant
- Shop towels or rags
- Safety gloves
- Safety glasses
- Brake cleaner or parts cleaner
- Gasket scraper designed for aluminum surfaces
- Magnetic parts tray or small storage containers
Recommended Supplies
These items are not required, but they make the job much easier.
- Flashlight or work light for better visibility
- Painter's tape or masking tape for labeling connectors
- Permanent marker
- Torque specification sheet for your delete kit
Pro Tip
As you remove parts, keep the hardware grouped by component instead of placing everything in one container.
For example:
- Intake bolts
- EGR cooler bolts
- Intake elbow hardware
- Coolant fittings
- Electrical fasteners
Label electrical connectors and coolant hoses before disconnecting them. This simple step helps prevent mistakes during reassembly and saves time when you begin installing the new 6.4 Powerstroke EGR delete kit.
Safety & Preparation
Park on level ground, set the parking brake, let the engine cool completely, disconnect both batteries, and drain the cooling system before any EGR cooler bolts come loose on a 6.4 Powerstroke.
The few minutes of preparation you put in before tackling a diesel engine are well worth your while. A few simple safety precautions are well worth it in order to keep yourself and your truck safe.
Before you get to removing parts, follow this checklist.
- Park the truck and engage the parking brake.
- Put a drain pan beneath the radiator.
- You should wear gloves and safety glasses the entire time.
Vehicle Positioning
Before You Start
Take a final look around the engine bay and make sure:
- The work area is clean and well lit.
- All replacement parts are ready to install.
- The correct 6.4 Powerstroke EGR delete kit is on hand.
- Every required tool is within easy reach.
- You have enough coolant available for refilling the system after the installation.
Completing these preparation steps reduces the chance of spills, misplaced hardware, and installation delays. Once everything is ready, you can begin removing the factory EGR system with confidence.
Battery Disconnect
Both the primary and secondary batteries must be disconnected. We remove the negative cables first, then the positive cables, and secure them away from the terminals. This step protects the ECM and prevents accidental shorts while we work near the intake and wiring harnesses.
Safe Coolant Drainage
We place the drain pan under the lower radiator hose or the petcock. After the system empties we open the degas bottle cap to let air in and speed the drain. We keep the drained coolant for proper disposal; never pour it on the ground.
6.4 Powerstroke EGR Delete Kit Instructions: Step-by-Step Installation
Remove the intake components, disconnect and label all cooler coolant lines, unbolt the vertical and horizontal EGR coolers, install the block-off plates with new gaskets to the manufacturer torque, fit the intake elbow, reroute coolant, refill, bleed, and flash a delete-capable tune.
Once your work area is prepared and all the necessary tools are within reach, you can begin removing the factory EGR system. Work through each step in order and inspect every connection before moving to the next stage.
Step 1: Removing the Factory EGR System
The first thing you'll do in this installation process is remove your stock EGR parts. You'll need to do this to make room for your new delete kit. You'll want to take it slow and keep a good inventory of all your bolts, connectors, and hoses as you remove them.
Here's how you do it:
- Remove the intake tubing and any other pieces that are in the way of the EGR valve and cooler.
- Disconnect all electrical connectors from the EGR valve and any related sensors.
- Remove the coolant lines from the EGR cooler (it's the vertical one). Use tape to label each hose so you know exactly where they need to go back.
- Remove all bolts connecting the EGR coolers (both vertical and horizontal) and carefully remove the entire assembly from your engine bay.
- Remove the EGR valve, factory pipe, and throttle linkage - this will depend on the specific EGR delete kit you have purchased.
Pro Tip: Aluminum can be really tough to clean, so try using a gasket scraper (a thinner one works best) on any of the old gasket material. Be sure to clean all your mounting surfaces so that nothing remains on the engine! Even a small piece of gasket will cause you a massive coolant and/or exhaust leak.
Step 2: Installing the Ford 6.4 EGR Delete Kit Components

Once your original EGR equipment is out of the way, you can begin to install the parts that came with your Ford 6.4 EGR delete kit.
- You'll want to install them in the following order:
- Install the block-off plates with the provided gaskets.
- Tighten all fasteners according to your kit manufacturer's torque recommendations.
- Install the new intake elbow or throttle pipe provided with the kit.
- Make sure all of your O-rings are properly seated before tightening all the clamps.
- Install the coolant bypass hose or coolant plugs as per your kit instructions.
- Double-check the routing of all hoses to make sure that none of them are touching any hot or moving engine components.
Final Inspection Before Moving On
Before refilling the cooling system, check the following:
Inspection Point |
Verify |
|---|---|
Block off plates |
Fully seated |
Gaskets |
Correctly aligned |
Intake elbow |
Secure |
Hose clamps |
Tight |
Electrical connectors |
Reconnected |
Coolant reroute |
Properly installed |
Taking a few extra minutes here can prevent coolant leaks and save you from removing parts again later.
Step 3: Coolant Refill, Bleeding, and Final Checks
After the mechanical installation is complete, now, let's get that cooling system refilled and any air out of it before you hit the road.
Follow these steps:
- Top up with the correct coolant mixture, per the instructions given by the coolant manufacturer.
- Start the engine with the heater set to full, allowing it to reach operating temp.
- Keep adding coolant, as air works its way out of the cooling system, until the coolant level holds steady.
- Check the hoses and fittings, and any blanking plates, for any leaks.
Now would be a good time to check for coolant leaks using a pressure tester if you have one. Some small leaks only become apparent under pressure and not just while the engine is idling.
Pro Tip
After the first full heat cycle (engine heats up and cools down), go back and recheck the torque on your block-off plate fasteners. Heat expansion can sometimes cause the clamp force to loosen up slightly.
Step 4: Tuning & ECM Considerations
Installing a 6.4 Powerstroke EGR delete changes the way the engine management system operates. Your 6.4 Powerstroke is a smart truck. With the EGR delete, your engine's ECM is going to recognize that there is an emissions component missing, and it's going to light up a warning light and derate the engine if it's not properly tuned.
With your EGR delete installed:
- Plug in your programmer (ensure that your EGR delete kit is compatible with your programmer)
- Load your calibration, which disables all of your EGR functions
- Ensure your Diesel Particulate Filter (DPF) and Diesel Exhaust Fluid (DEF) are set to match your specific setup.
The correct tune is just as important as the installation.
If you plan on towing very heavy loads, please make sure to explain this to your tuner provider, and they should be able to tell you which calibration is best for your truck.
Installation Stages Summary
| Installation Stage | Critical Action | Common Error to Avoid |
|---|---|---|
Cooler removal |
Label every hose and connector |
Mixing up coolant supply and return lines |
Surface prep |
Clean aluminum to bare metal |
Leaving old gasket material that causes leaks |
Plate install |
Torque in sequence to spec |
Over-tightening and cracking the plate |
Coolant fill |
Bleed with heater on high |
Trapped air that causes overheating |
Tuning |
Flash full EGR/DPF delete |
Partial tune that leaves limp mode active |
Installation Check: Before closing the hood, perform one final inspection of every hose, electrical connector, clamp, and fastener. A careful five-minute inspection now is much easier than fixing a leak after the truck is back on the road.
If you plan to remove additional emissions components at the same time, consider an all-in-one 6.4L Powerstroke delete kit that combines the required parts into a single package for compatible off-road applications.
Troubleshooting Common Issues During Ford 6.4 EGR Delete Instructions
Coolant leaks come from poorly seated block-off plates or loose clamps. Check-engine lights usually mean a missed sensor plug or an incomplete delete tune. Rough idle points to an intake leak at the new elbow.
After a well-executed install, you may experience some small issues during the first startup or road test.
Coolant Leaks
One of the most common post-installation issues of a 6.4 Powerstroke EGR delete is a minor coolant leak. These leaks might only manifest after the engine has reached full temperature and the cooling system pressurizes.
Start with a careful inspection of all the coolant bypass fittings, hose connection point and block off plate gaskets. If a gasket is slightly askew during the installation it can allow a slow leak.
If there's still a coolant leak after an initial check look at:
- The hose clamps
- The o rings
- The coolant plugs
- The block off plate seals
Before attempting to retighten any fittings or swap out a seal let the engine completely cool down.
Check Engine Light
It is typically the electric connections or a tune if your check engine light turns on after installing your EGR delete. Before blaming your new delete kit, verify that all your sensors and connections that had to be disconnected during your install are secure.
Hook up a scan tool and find out what diagnostic trouble codes are being stored. If the 6.4 Powerstroke EGR delete kit was correctly installed then the ECM would have needed to be reflashed with an EGR delete tune that is functioning correctly.
Once the physical intake elbow and bypass plates are torqued down, your truck’s ECU will immediately throw diagnostic fault codes (DTCs) due to missing EGR flow sensors. You must flash an EGR-disable tune to clear the check engine light and prevent limp mode.
Check out our expert reviews on the best tuner for 6.4 Powerstroke to choose a programmer that matches your engine setup.
Rough Idle
The truck may idle poorly if the intake system develops a leak. This can be attributed to an intake clamp being too loose or a seal that isn't sitting properly in place. This allows the engine to suck in unmetered air which in turn negatively affects the idle and throttle response.
Difficult Coolant Line Removal
Over years of expanding and contracting, factory coolant hoses become welded onto the metal fitting. Aggressively yanking and pulling on the coolant hose to remove it will damage it as well as the metal fitting.
Block Off Plate Leaks
When you observe black soot around the block off plates following the first drive, the block off plate isn't sealing properly. This means you'll want to pull the plate out and carefully inspect the block off plate and the mating surface on the exhaust manifold. Realign the gasket before installing the block off plate back with hardware.
Perform One Final Inspection
Before considering the job finished it is critical to double and triple check the engine bay one last time to ensure that all sensors, electrical connectors and hoses have been properly reconnected and secured.
You will also want to look carefully for any signs of coolant or exhaust leaks and that there are no spare tools or hardware in the engine bay. An extra inspection can take very little time but could save you hours in troubleshooting.
6.4 Powerstroke EGR Delete Installation Tips
Label every hose and connector, keep bolts in marked bags, replace any corroded clamp, inspect up-pipes and turbo while the bay is open, and perform a full leak inspection both hot and cold.
And here are a few helpful hints for installation.
- Label Every Hose and Connector: Make sure to label your hoses and connectors prior to removal so that you know where everything goes.
- Keep Bolts Grouped by Component: Group your bolts and hardware by components so that they don't get all mixed up during installation.
- Replace Worn Clamps or Seals: Make sure to replace your O-rings, gaskets, and hose clamps if the current ones look like they've been through it.
- Inspect Nearby Components: Since you will have easy access to everything, go ahead and take a look at your up pipes, turbo inlet, coolant lines, and wire harness.
- Perform a Final Leak Inspection Twice: After initial startup, as well as one complete heat cycle, check to make sure you don't have any coolant or exhaust leaks.
Eliminating the double EGR cooler setup is widely considered the single most effective way to protect your 6.4L engine from catastrophic coolant-to-exhaust leaks and severe thermal strain.
To see what other proactive maintenance steps you should take alongside hardware upgrades, read our ultimate breakdown on improving 6.4 powerstroke reliability.
How Long Does a 6.4 EGR Delete Installation Take?
A first-time DIY install of a 6.4 EGR delete kit takes 8–12 hours. An experienced technician finishes in 4–6 hours. Rusted bolts, missing tools, and imperfect surface cleanup add the most time.
The time required for deleting a 6.4 Powerstroke depends on your experience, the condition of the truck, and the quality of the delete kit 6.4 Powerstroke you are installing. A first time installation usually takes longer because you will spend more time organizing parts, cleaning surfaces, and checking each step.
Estimated Installation Time
- First Time DIY Installer: Plan for 8 to 12 hours to complete the installation without rushing.
- Experienced Technician: Someone familiar with a Ford 6.4 EGR delete can usually complete the job in 4 to 6 hours.
Factors That Can Increase Installation Time
Factor |
Time Added |
Prevention |
|---|---|---|
Corroded bolts |
1–3 hours |
Penetrating oil overnight |
Missing swivel sockets |
1–2 hours |
Full metric set with swivels |
Poor surface cleanup |
2–4 hours (re-work) |
Brake cleaner and plastic scraper |
Incomplete labeling |
30–60 min |
Tape and marker from the start |
Several factors can slow down the installation, including:
- Corroded Hardware: Rusted bolts and seized fasteners often require extra time to remove.
- Limited Access: The compact engine bay makes some components difficult to reach without the proper tools.
- Surface Preparation: Cleaning old gasket material thoroughly helps prevent future coolant and exhaust leaks.
If you are working on a 2008 Ford F250 6.4 EGR delete kit or another early model truck, expect additional time if the original hardware has heavy corrosion. Working patiently and inspecting your progress at each stage will usually save more time than rushing the installation.
FAQs
Is a 6.4L EGR delete legal for street use?
In most areas, a 6.4 delete is intended for off road or competition vehicles only. Always check your local emissions regulations before installing a Ford 6.4 EGR delete kit.
Can I install a 6.4 EGR delete kit at home?
Yes. If you have intermediate mechanical experience, the proper tools, and enough time, you can complete the installation by following reliable EGR Performance EGR delete instructions.
What causes coolant leaks after installation?
Coolant leaks are usually caused by a shifted gasket, under-torqued plate bolts, a hose clamp that never seated on the bead, damaged O-rings, improperly seated gaskets, or trapped air in the cooling system. Re-cleaning and re-torquing after the first heat cycle fixes nearly all of them.
What vehicles use the 6.4L Powerstroke EGR delete kit?
Most kits fit 2008 through 2010 Ford F250, F350, F450, and F550 trucks equipped with the 6.4 Powerstroke EGR system. Always confirm fitment before purchasing.
Do I need to drain the coolant before removing the EGR coolers?
Yes. Draining the cooling system helps prevent coolant spills and makes it easier to remove the factory EGR coolers safely.
Do I need a tuner after installing a 6.4 EGR delete kit?
Yes. A compatible tuner is required to disable the factory EGR programming and prevent diagnostic trouble codes or reduced engine performance.
What should I double-check before starting the engine?
Verify that all electrical connectors, coolant hoses, hose clamps, and block-off plates are secure. Refill the cooling system and inspect the engine for any visible leaks.
Can an EGR delete cause overheating on a 6.4 Powerstroke?
A properly installed Ford 6.4 EGR delete should not cause overheating. Problems are usually related to trapped air, low coolant, or an improperly bled cooling system.
What torque specs should I use for EGR delete block-off plates?
Always use the torque values provided by the manufacturer of your delete kit for the 2008 6.4 Powerstroke or the kit you are installing to avoid damaging gaskets or fasteners. Typical values fall between 18 and 22 ft-lbs for aluminum plates in a crisscross sequence.
How do I bleed the cooling system after EGR delete on 6.4L?
Refill the cooling system, start the engine with the heater on high, allow it to reach operating temperature, and continue adding coolant as trapped air escapes.
Will an EGR delete void my warranty on a 6.4 Powerstroke?
Removing factory emissions equipment may affect your vehicle's warranty. Review your warranty terms before making any modifications.
What's the difference between EGR delete and full delete on 6.4L?
An EGR delete removes the Exhaust Gas Recirculation system. A full delete typically includes additional emissions components, such as the DPF, depending on the vehicle and kit.
Are there any emissions tests I will fail after the EGR delete?
Many regions require all factory emissions equipment to remain installed. An EGR deleted truck may not pass emissions testing where inspections are required.
What should I do if I get a check engine light after installation?
Scan the truck for diagnostic trouble codes, verify all electrical connections, and confirm the correct delete tune has been installed.
Can I revert to stock EGR after installing a delete kit?
Yes. As long as you keep the original components in good condition, you can reinstall the factory EGR system if needed.
Conclusion
Installing a 6.4 Powerstroke EGR delete kit takes careful planning, the right tools, and close attention to detail. By preparing the truck properly, removing the factory EGR system, installing the new components correctly, completing the required tuning, and checking for leaks before driving, you can complete the job with confidence.
If you need a 2008 -2010 Ford F250/F350 6.4 diesel EGR delete kit, always choose components designed specifically for your truck to ensure proper fitment and reliable performance.
Finally, remember that EGR delete kit 6.4 Powerstroke instructions are intended for off-road or competition use where permitted by law.
If you are upgrading your truck or replacing worn components, browse the full range of 6.4 Powerstroke EGR delete products to find parts designed specifically for your engine and model year.